Wie verbinde ich die Kamera per LAN-Kabel mit dem PC, damit sie erkannt wird?
Die SMTAV-Kamera hat eine Standard-IP-Adresse: 192.168.100.88. 
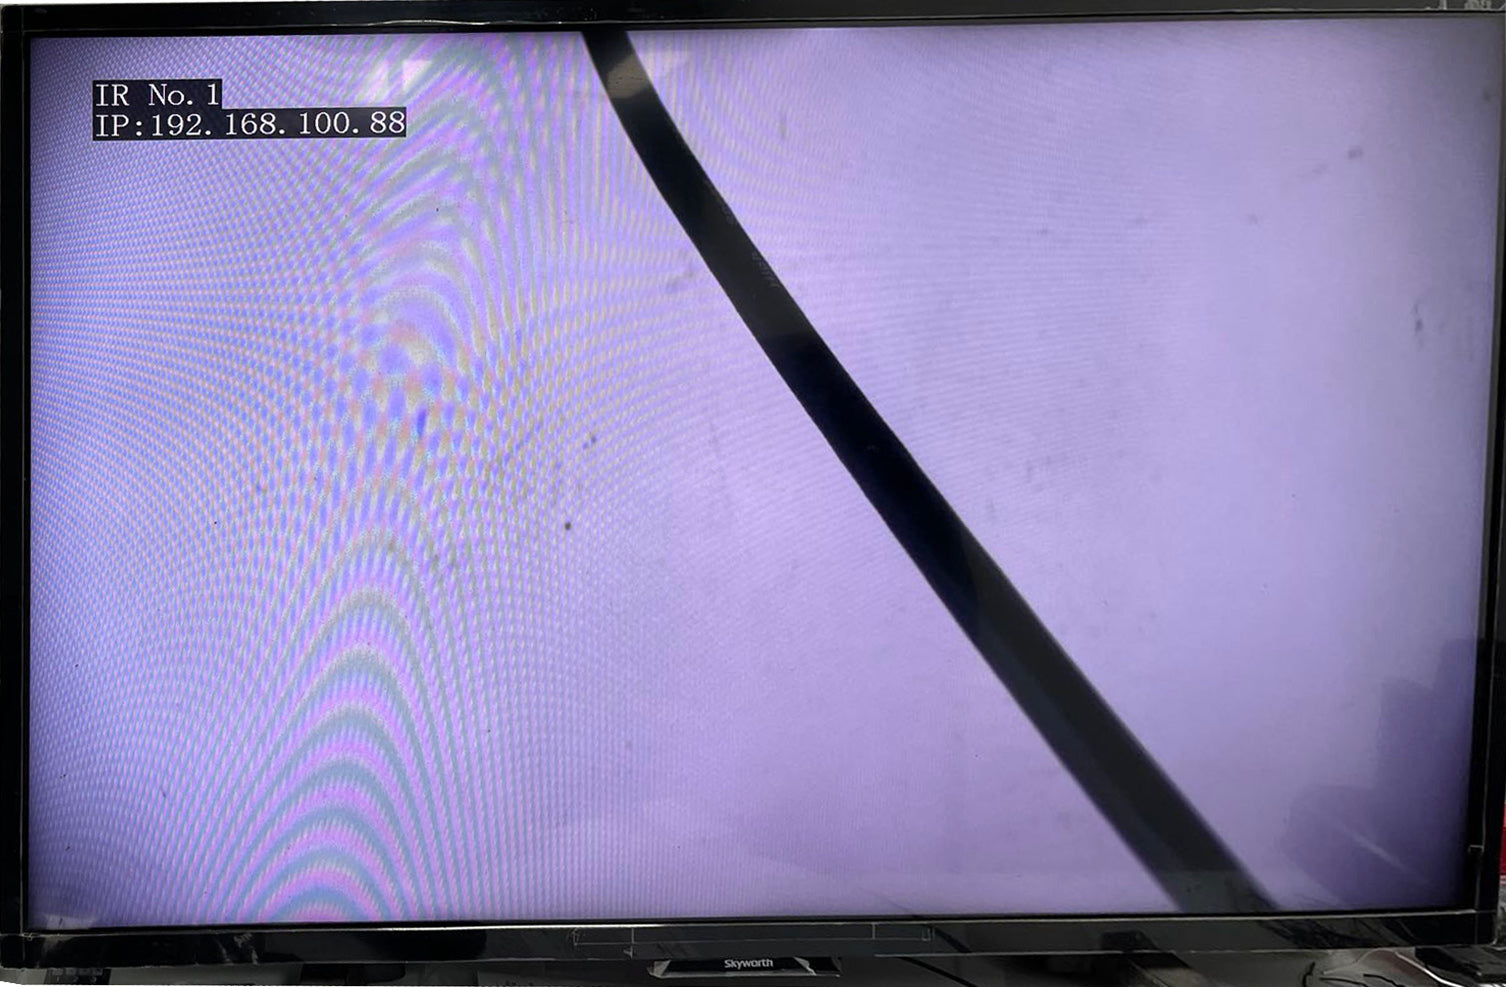
Wenn Sie die Kamera über HDMI an einen Monitor oder ein Anzeigegerät angeschlossen haben, wird beim Starten der Kamera die IP-Adresse der Kamera in der oberen linken Ecke des Bildschirms angezeigt.
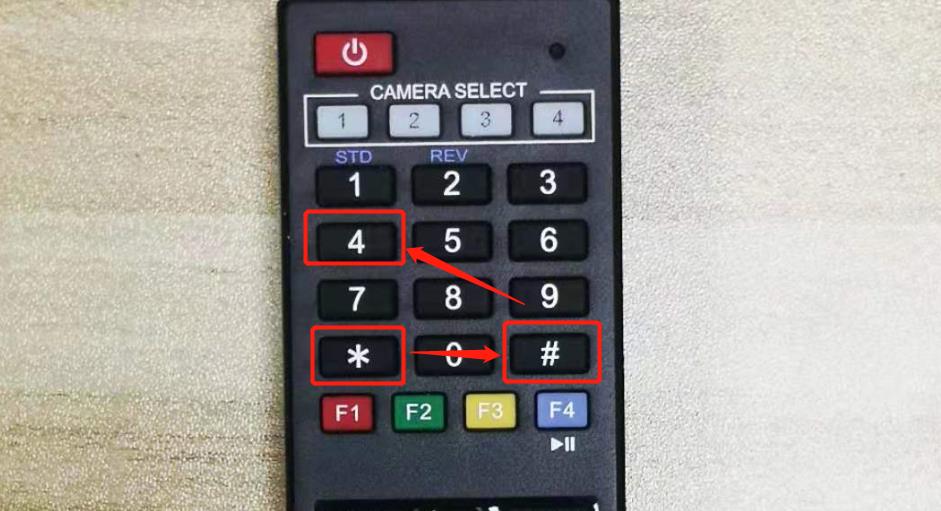
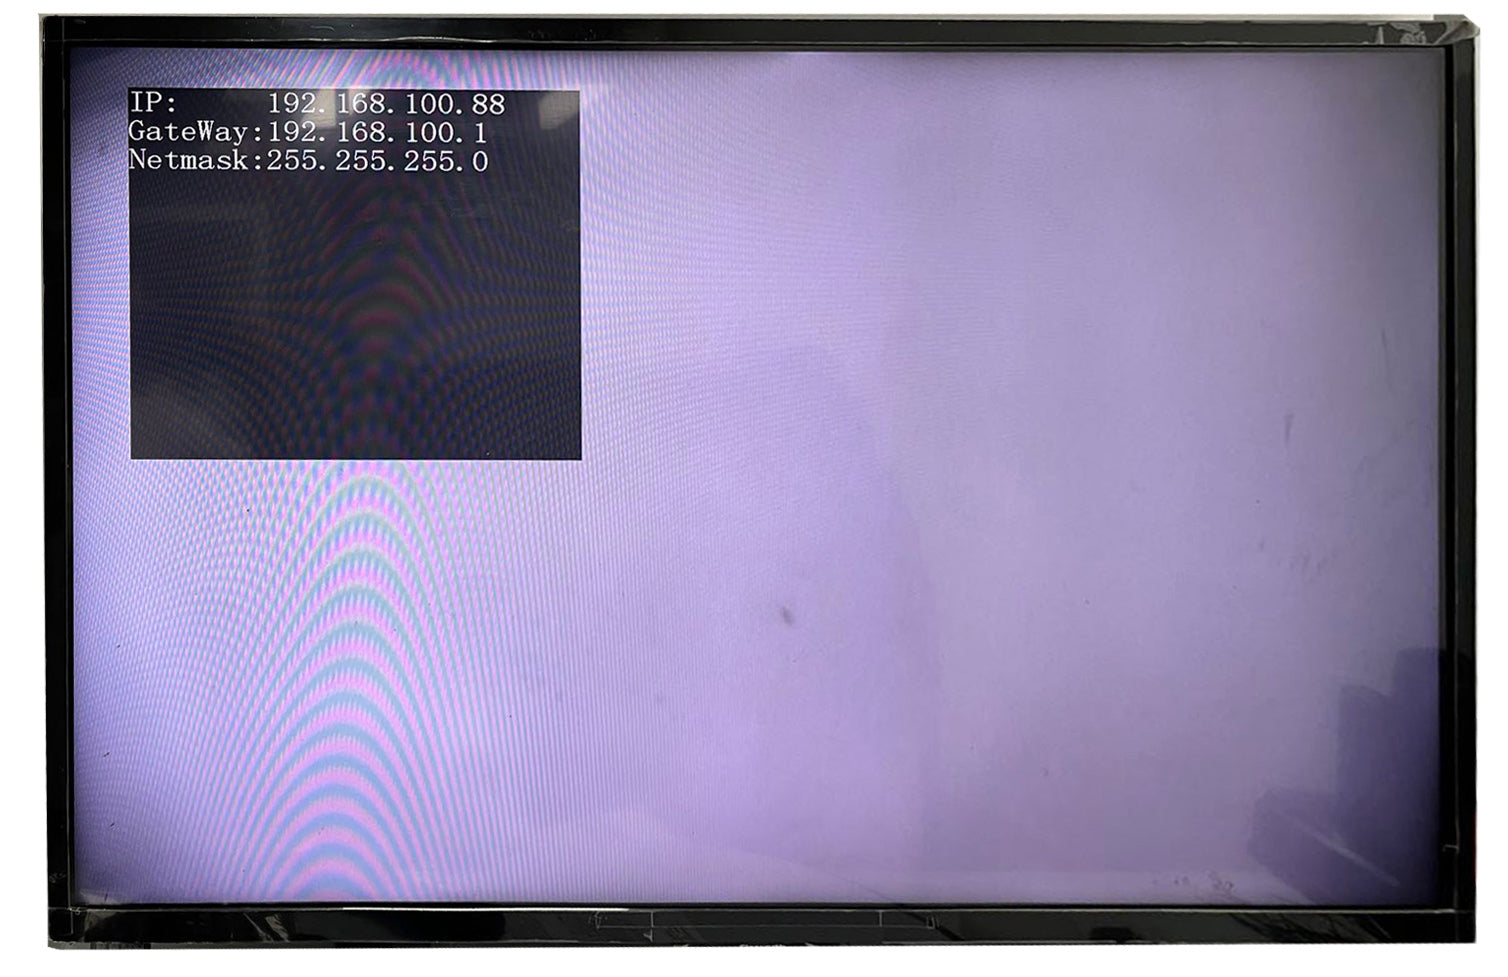
Wenn die Kamera bereits eingeschaltet ist, können Sie die Tasten * # 4 nacheinander auf der Fernbedienung der Kamera drücken. Die IP-Adresse, das Gateway und die Subnetzmaske der Kamera werden auf dem Bildschirm angezeigt
Verbinden Sie die Kamera über ein Netzwerkkabel direkt mit Ihrem Computer (sofern Ihr Computer über eine RJ45-Schnittstelle verfügt), oder verbinden Sie die Kamera mit Ihrem Router und verbinden Sie anschließend Ihren Computer über ein Netzwerkkabel oder WLAN (kabellos) mit dem Router.
HINWEIS: Je nach Ihren Bedingungen oder Anforderungen ist jede Methode geeignet.
1. Verbinden Sie die Kamera über ein Netzwerkkabel direkt mit Ihrem Computer
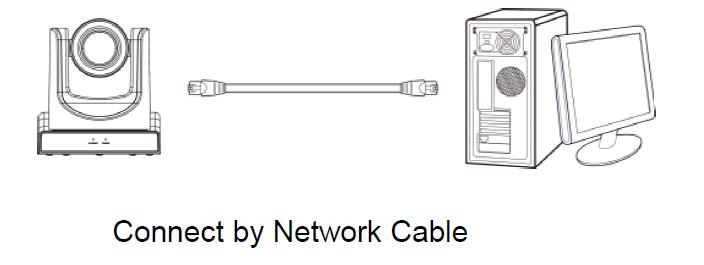
2.Verbinden Sie die Kamera über einen Switch oder Router mit einem Netzwerkkabel mit Ihrem Computer
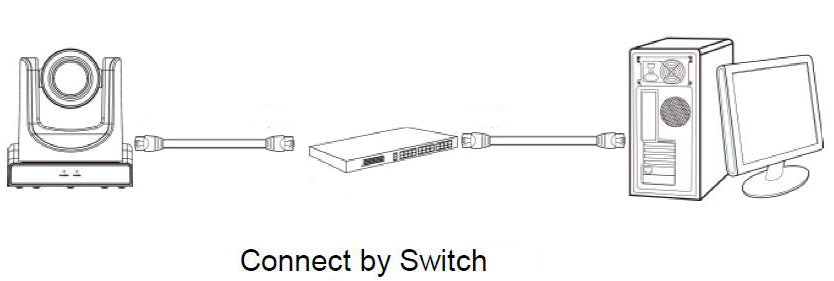
3. Verbinden Sie die Kamera über einen Switch oder Router mit einem Netzwerkkabel und verbinden Sie Ihren Laptop über WLAN (drahtlos) mit dem Router.
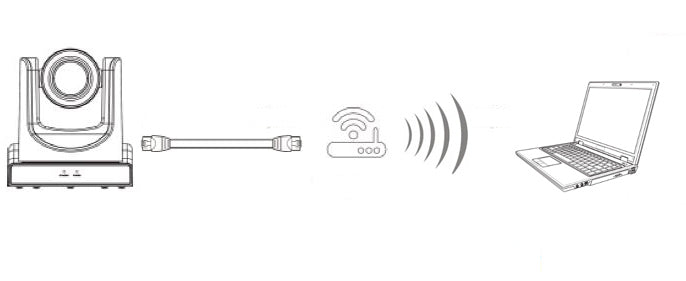
Ändern Sie die IP-Adresse Ihres Computers in 192.168.100.xxx (xxx ist eine Ganzzahl von 2-254 außer 88).
Sie können sich auf Folgendes beziehen: Wie konfiguriere ich die TCP/IP-Eigenschaften der drahtlosen Verbindung auf meinem Computer (Windows XP, Vista, 7, 8, 10, Mac), um auf SMTAV-IP-Kameras zuzugreifen?
Hier finden Sie eine ausführliche Anleitung zum Einstellen der IP-Adresse Ihres Computers auf 192.168.100.xxx (xxx ist eine Ganzzahl von 2-254 außer 88).
Wenn Sie die IP-Adresse Ihres Computers ermitteln müssen, können Sie dies mithilfe der Eingabeaufforderung unter Windows oder des Terminals unter Macs tun.
Um dies auf einem PC zu tun, geben Sie „CMD“ in Ihre Suchleiste im Windows-Menü ein. Sie sollten ein schwarzes Popup-Fenster sehen, in das Sie etwas eingeben können. Wenn Sie „ipconfig“ eingeben und auf Ihrer Tastatur die Eingabetaste drücken, werden in Ihrer Eingabeaufforderung eine Reihe von Informationen angezeigt.
Geben Sie auf einem MAC- oder Linux-Computer „ifconfig“ in das Terminal ein und drücken Sie die Eingabetaste.
HINWEIS: Nachdem Sie die IP-Adresse Ihres Computers auf 192.168.100.xxx eingestellt haben, verlieren Sie möglicherweise vorübergehend den Zugriff auf Ethernet. Dies ist jedoch nur vorübergehend. Wir werden es wieder ändern, wenn wir mit der Einrichtung der Kamera fertig sind.
Rufen Sie dann über einen Webbrowser die IP-Adresse der Kamera (192.168.100.88) auf. Sie werden dann aufgefordert, den Benutzernamen und das Passwort einzugeben. Der anfängliche Benutzername und das Passwort lauten beide admin
Nachdem Sie den richtigen Benutzernamen und das richtige Passwort eingegeben und die Eingabetaste auf Ihrer Tastatur gedrückt haben, öffnen Sie die WEBUI der Kamera
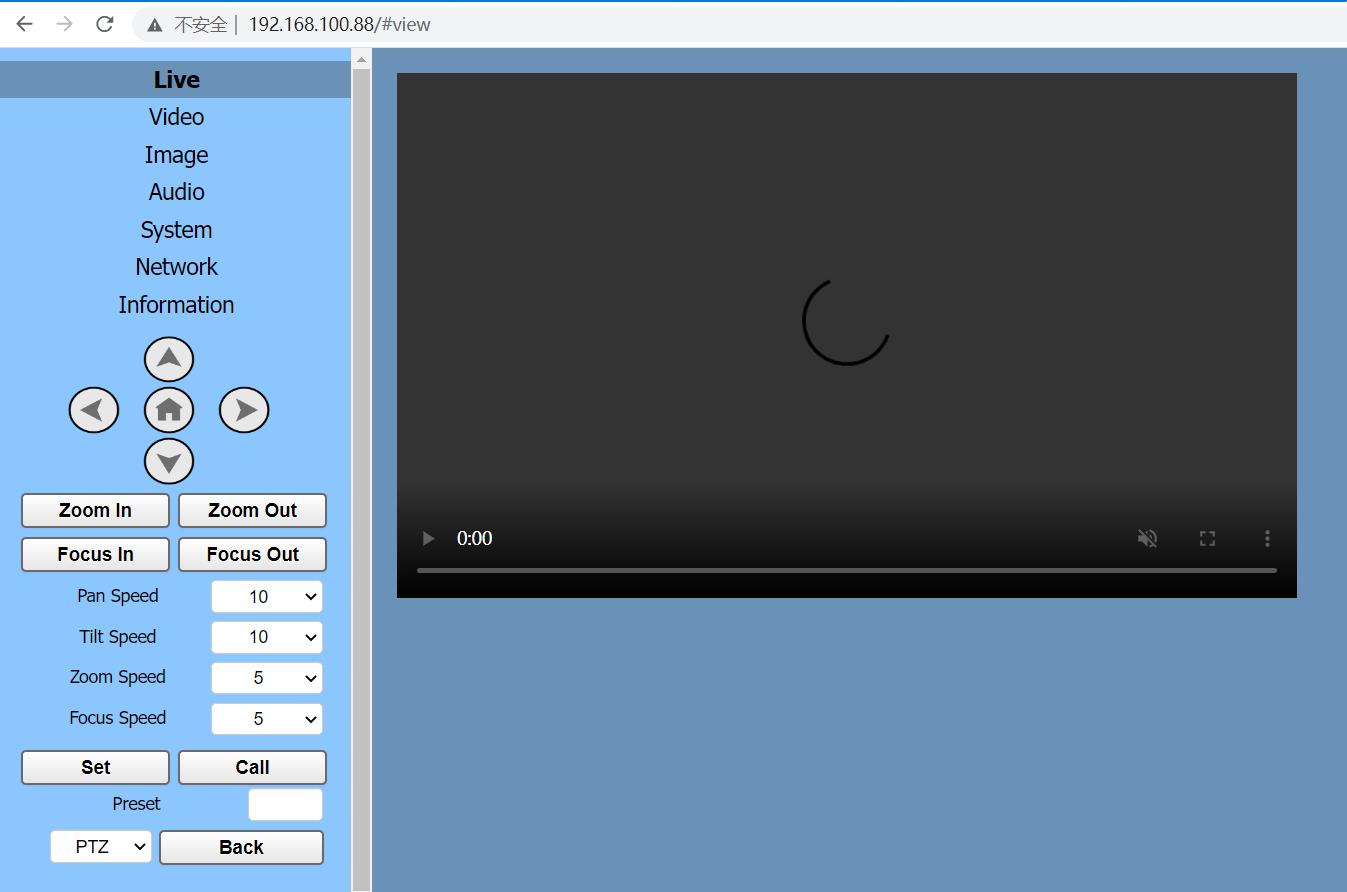
Auf der Registerkarte „NETZWERK“ der WebUI der Kamera können Sie die IP-Adresse , die Subnetzmaske und das Gateway der Kamera ändern. Klicken Sie anschließend auf „ Senden “ und starten Sie die Kamera neu (aus- und wieder einschalten).
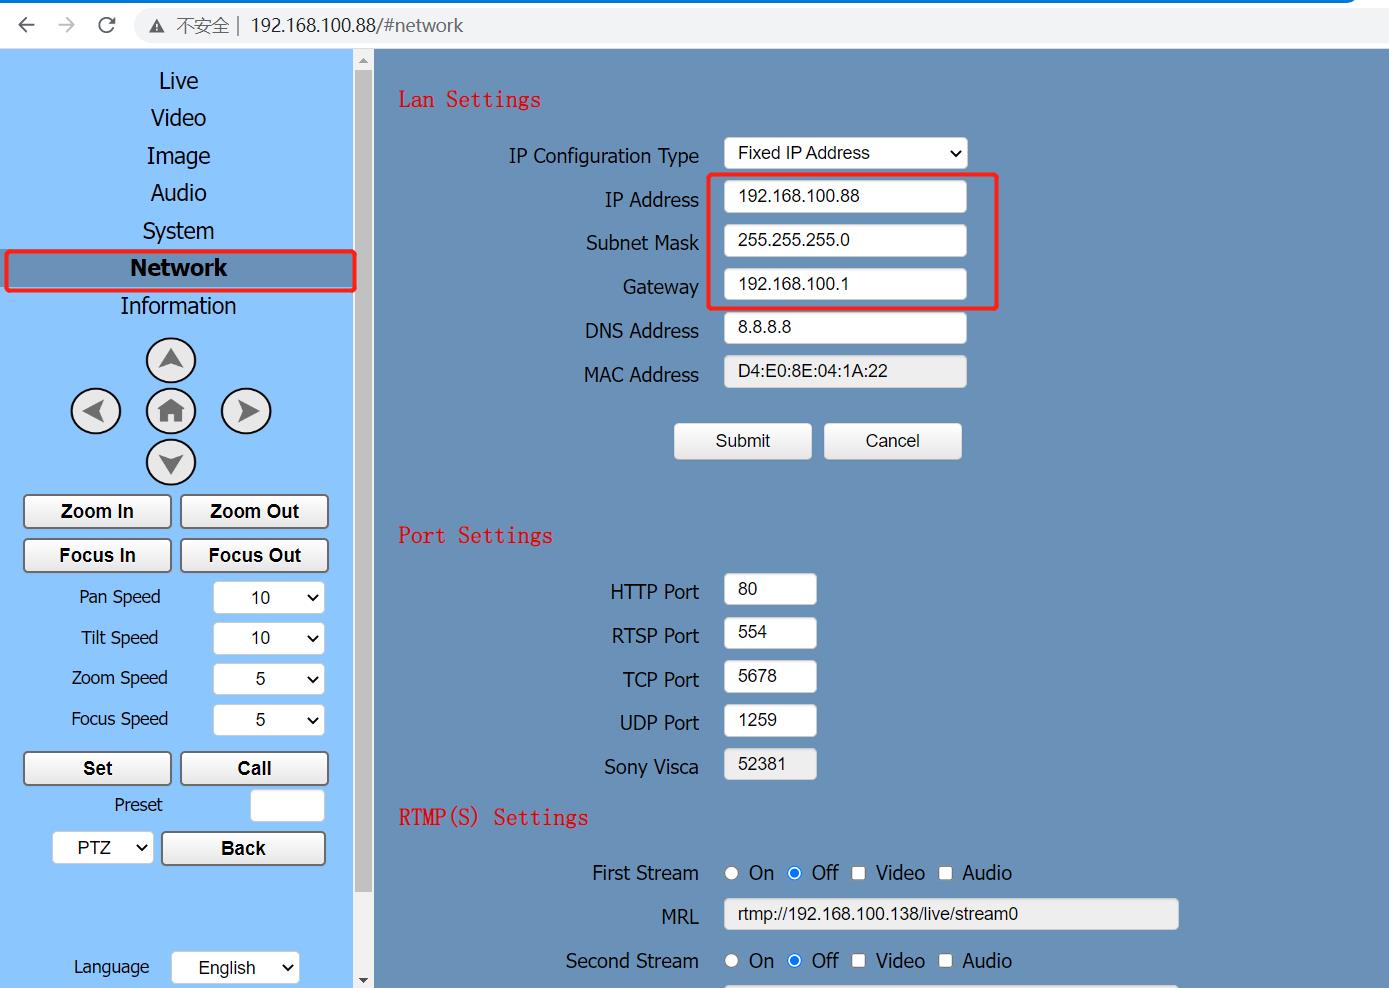
HINWEIS: Es ist besser, eine feste IP-Adresse zu verwenden, denn wenn Sie eine dynamische IP-Adresse festlegen, wird die IP-Adresse der Kamera bei jedem Neustart der Kamera neu zugewiesen.
Wenn Sie sowohl auf das externe Netzwerk als auch auf die Kamera zugreifen möchten, müssen Sie die IP-Adresse der Kamera in den von Ihrem Router zugelassenen Adressbereich ändern.
Wenn Sie mehrere Kameras haben, richten Sie diese bitte einzeln ein. Jeder Kamera sollte eine IP-Adresse zugewiesen werden, die nicht in Konflikt geraten kann. Nachdem die Einstellung abgeschlossen ist, verbinden Sie sie gemeinsam mit dem Netzwerk.
Nachdem Sie die IP-Adresse der Kamera geändert haben, verwenden Sie bitte dieselbe Methode, um die IP-Adresse Ihres Computers auf die ursprüngliche Adresse zurückzusetzen oder DHCP zu aktivieren.
This blog post is a lifesaver! As someone who always struggled with the technicalities of connecting a camera to a PC via LAN cable, this guide came to my rescue. The step-by-step instructions are incredibly user-friendly, making the process seem much less daunting. What I appreciate the most is the clarity in explaining the intricacies of the connection, ensuring that even those without a tech background can successfully set up their cameras. The troubleshooting tips provided are an added bonus, addressing potential hiccups along the way. Kudos to the author for simplifying what can be a complex task and empowering users to effortlessly connect their cameras to their PCs. A must-read for anyone looking to enhance their surveillance setup!
I hope this email finds you well. I wanted to take a moment to discuss how our Monthly SEO Services can significantly impact your business’s bottom line, driving both profit and sales growth.
1. Increased Visibility, Increased Sales
2. Targeted Traffic for Conversions
3. Enhanced Conversion Rates
4. Competitive Edge in Sales
5. Measurable ROI
6. Adaptation to Market Trends
We’d be thrilled to discuss how our tailored Monthly SEO Services can specifically contribute to the profitability and sales growth of your business. When would be a convenient time for a discussion? Let’s collaborate to unlock the full potential of your online success. Find out more at https://alwaysdigital.co/r
Hello Team,
I’m not your typical Business Development Manager here at Estura Software Company, and I’ve got something exceptional to share with you.
Picture this: a “secret sauce” that’s been powering your competitors all this time.
What if I told you that within just 24 hours, you could have a comprehensive list of potential business clients ready for you to connect with?
Introducing the world’s most powerful lead generation desktop software. With this tool in your arsenal, you can effortlessly scrape unlimited contact details from various platforms, including Google Maps, Trust Pilot, Yellow Pages (USA, UK, and Canada), LinkedIn People, LinkedIn Company, and LinkedIn Sales Navigator.
Using this software is a breeze. You input your keywords, select your platforms, fine-tune your settings, and let the magic happen. It scrapes these platforms, collects vital business contact information, and neatly compiles it into a single file. To make the most of this software, we recommend diving into our detailed tutorials. Once you’ve got your list of potential clients, you’re all set to connect with them via email, phone, social media, and more.
Here’s the kicker: I’m offering you a FREE TRIAL of the FULL VERSION for an entire month. No hidden charges, no credit card details needed. Generate unlimited leads for your business for an entire month for FREE!
I have already pre-approved smtav.com for a 30-day free trial. To activate your free trial, head to https://estura.co.uk/free-demos/
Make sure to enter your full business name and smtav.com inside the request form to activate your free trial.
Best wishes
Christiane Frederic (Your awesome friend at Estura)
Iceland, NA, Hvolsfollur, 860, Klausturvegi 46, 413 8653 (That’s where the magic happens)
By way of introduction, I am Scott Gould with Consumer Products International, a leader in sales, marketing, and distribution, connecting product manufacturers with major retailers within the United States.
Discover how we can help you expand your reach and bring your products to American consumers.
For more information on distribution please visit: http://go.consumerproductsintl.com/cpi-2019/
Let’s explore the possibilities of collaboration. Contact us at 1-561-544-0719
I have 2 SMTAV HD Video Cameras, Model: BA30N. I am desperately trying to integrate them into 2 existing PTZ Cameras (not SMTAV) in a church system. I am using a closed network for the cameras rtsp:/10.1.10.101/1, rtsp:/10.1.10.102/1 (for the existing cameras) and rtsp:/10.1.10.103/1 & rtsp:/10.1.10.104/1 for the new SMTAVs. I see all 4 cameras via the Joystick Controller and can interact with them BUT the will not load in OBS, which needs to happen for us to keep these new acquisitions. There does not seem to be a logical reason. I was told that they might need an older firmware for them to be recognized by OBS as there are similar occurrences with the more expensive PTZ Optics brand. Have an old and the newest version of OBS with the same results. Do you have any thoughts of a resolution?